Navigate / search

Love, Harmony ~ Feb ATC ~ Dusty Attic ***Give Away***

 Here is my ATC for Dusty Attic’s  February ATC Challenge, the theme this month is “LOVE”

I have used the new ATC Shadow boxes for this ATC, I have also used the mini Cherubs, they are just adorable! I had fun creating this ATC!
I am sharing the love and having a  “Give Away” this month!!
If you would like to give this ATC Shadowbox a new home all you need to do to go in the draw is leave a comment on this post! I will be drawing the winner at the end of the month!
You will not only get this gorgeous ATC, I will also be throwing in a few Dusty Attic Pieces for you to enjoy too!!! 

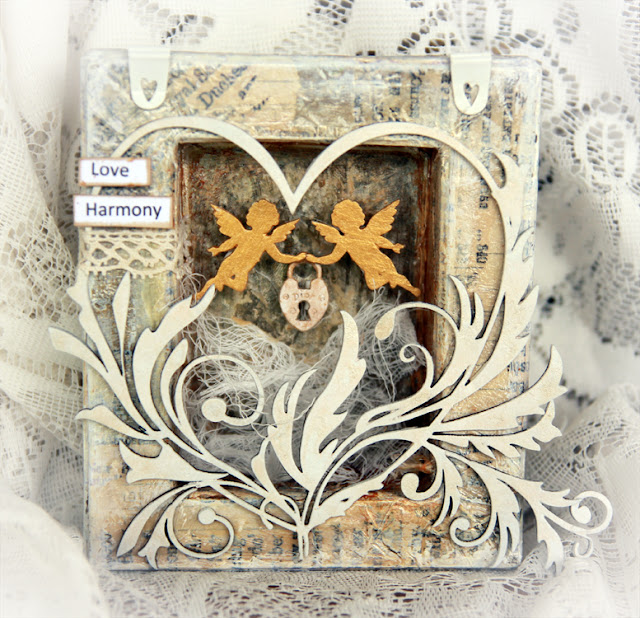
The ATC Shadow Box fits a standard ATC in the center of the frame, I covered the shadow box with tissue paper and note paper then spritzed with Ginger Ale Smooch. I painted the heart white then sprayed it with the Ginger Ale Smooch sprtiz too!

The cherubs were painted with gold paint!

Materials:
Dusty Attic
Heart Flourish  – DA0667
mini CherubDA0782
ATC Shadow BoxDA0823
Dusty In Colour
Navajo WhiteDA0903

Tissue & Note paper
Heart Lock charm
Gauze & Lace
Smooch Spritz – Caramel Latte & Ginger Ale


Don’t forget to leave a comment on this post to go in the draw to win this gorgeous ATC Shadow Box!
Good Luck!!!!

Freedom ~ Jan ATC & Tutorial ~ Dusty Attic

Welcome to my first Dusty post for 2013. The theme for this months ATC Challenge is Fairies & Flutterbies. These butterflies will soon be available in the next new release.

Flying Chipboard Butterflies – Tutorial

I wanted to create some butterflies with the appearance that they were flying.
This is an easy technique to create movement in your chipboard butterflies.
I have used the new Butterflies #3 that are coming out in the next release.

Step 1: I have used 2 medium and one of the small butterflies.

Step 2: Soak the butterflies in water and separate into 3 layers so 3 butterflies then become 9

Step 3: While the chipboard is still wet curl up the edges of the butterflies, then dry with a heat gun. The heat gun will help the edges curl a little more too.
Step 4: Once dry I have coloured them with Smooch Spritz – Citrus Tickle, then painted the edges of the butterflies with white paint.
Step 5: Use two layers of the butterflies for the medium butterflies. To create the body take a piece of craft wire and add some beads.
Step 6: Then fold the wire around the butterfly going between the antlers and around the back.

Step 7:
To Make the small butterflies I have used each separate layer individually and gently poked the wire through  the middle of the chipboard. Add some PVA glue as you do this to hold it in place.
Materials:
Dusty Attic Chipboard
ATC Chipboard Frame DA0663
Butterflies #3 DA0842

Dusty In Bloom
Mini Roses (Coming Soon)

Other:
Clearsnap – Smooch Spritz – Citrus Tickle, Splash & Ice Rink
Gauze
Wire
Beads

Thanks for Dropping By!
I hope you all have a fabulous year and that all your dreams come true! x
Hugs Michelle xx